Introduction
In this article I am going to walk through the creation of a new root and intermediate Certification Authority (CA) and then issue unique certificates to FortiGate firewalls via FortiManager which can be used for site to site VPN authentication.
Articles which I referenced during my lab build are:
Building the FortiAuthenticator VM
I followed this guide to deploy the FortiAuthenticator VM onto Proxmox. Even though it is for FortiPAM the steps are very similar. I couldn’t find a guide specifically for FortiAuthenticator but this did the job for me. https://docs.fortinet.com/document/fortipam/1.8.0/administration-guide/111844/installation-on-proxmox
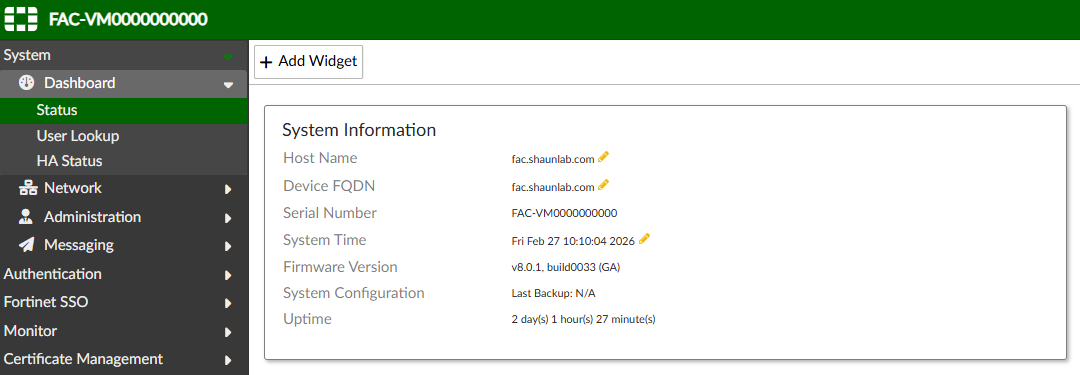
Configure System Information
The first time I logged into FortiAuthenticator I configured the following via Dashboard -> Status:
Host Name
Device FQDN
Time Zone
Root CA and Intermediate CA Setup
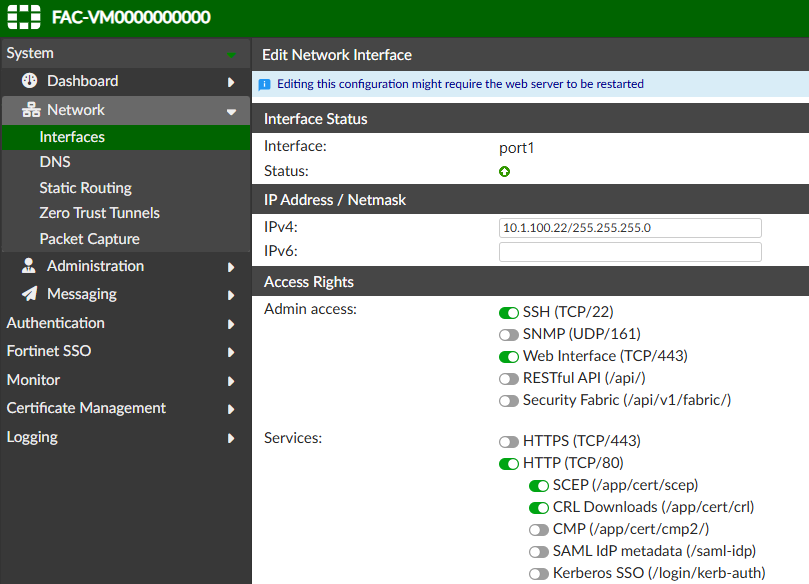
Enable HTTP, then enable SCEP and CRL:
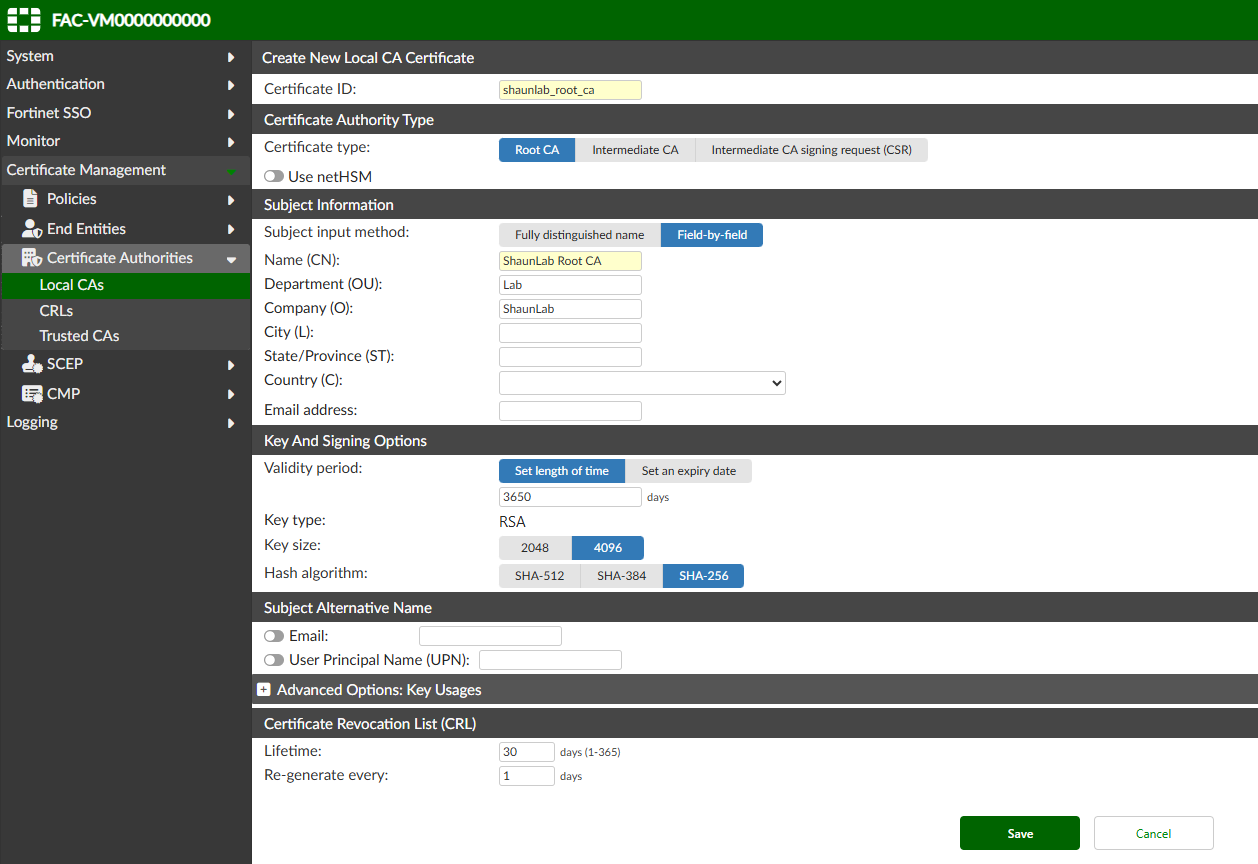
Create a root Certification Authority (CA):
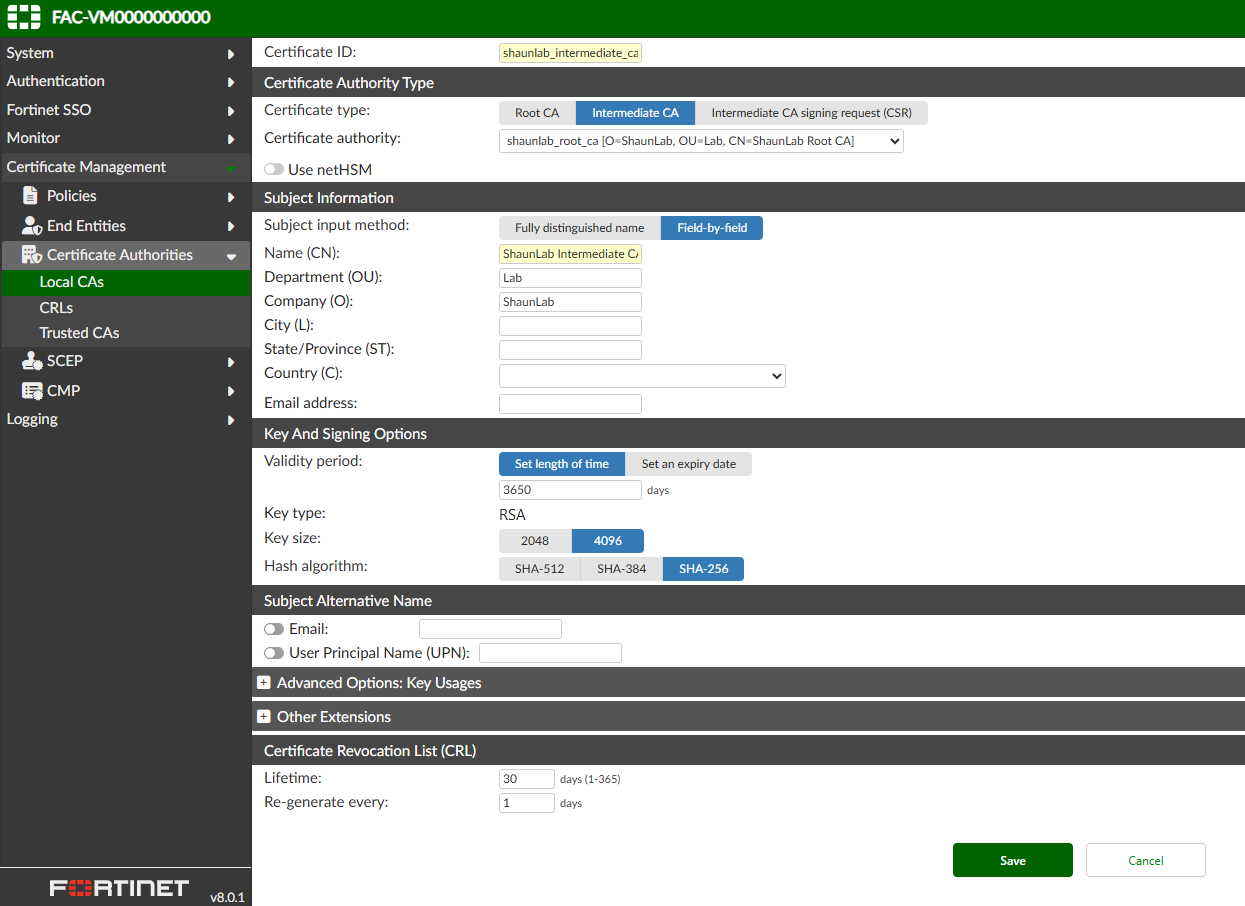
Create an intermediate Certification Authority (CA):
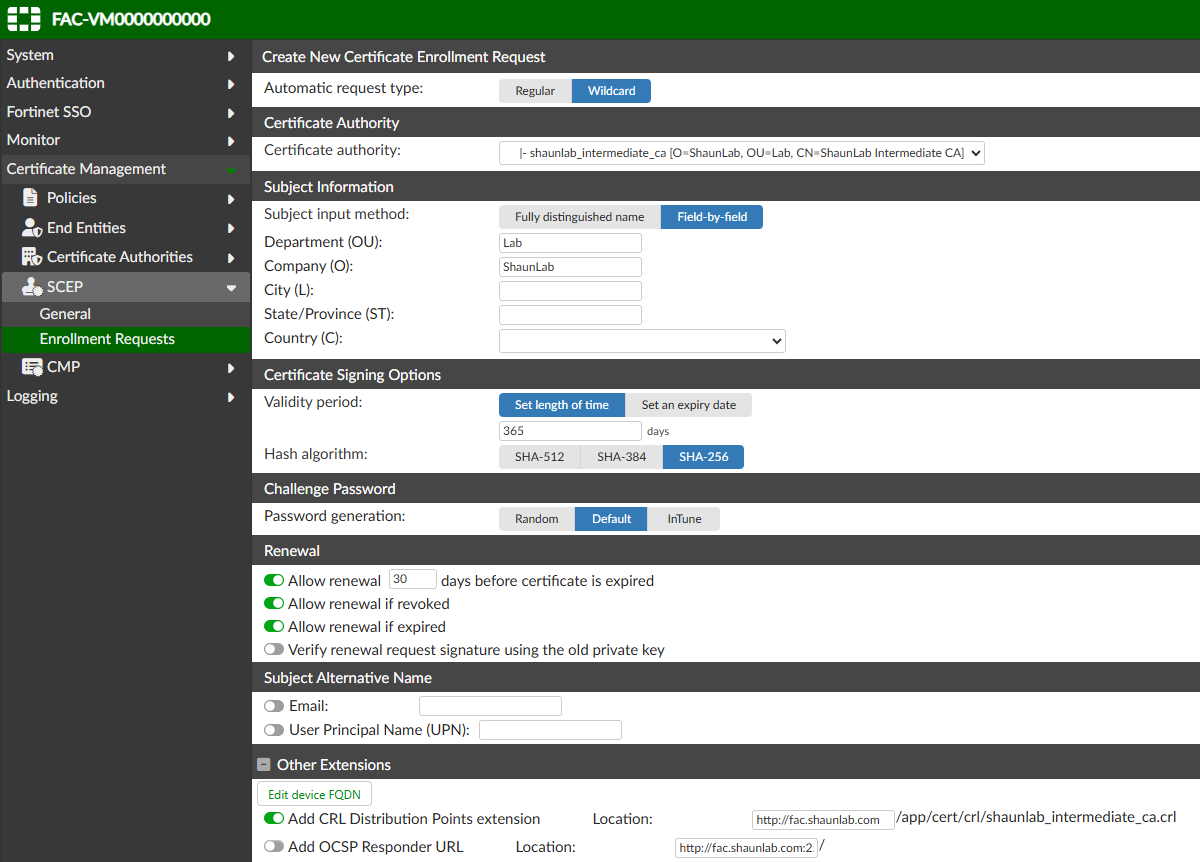
SCEP Configuration
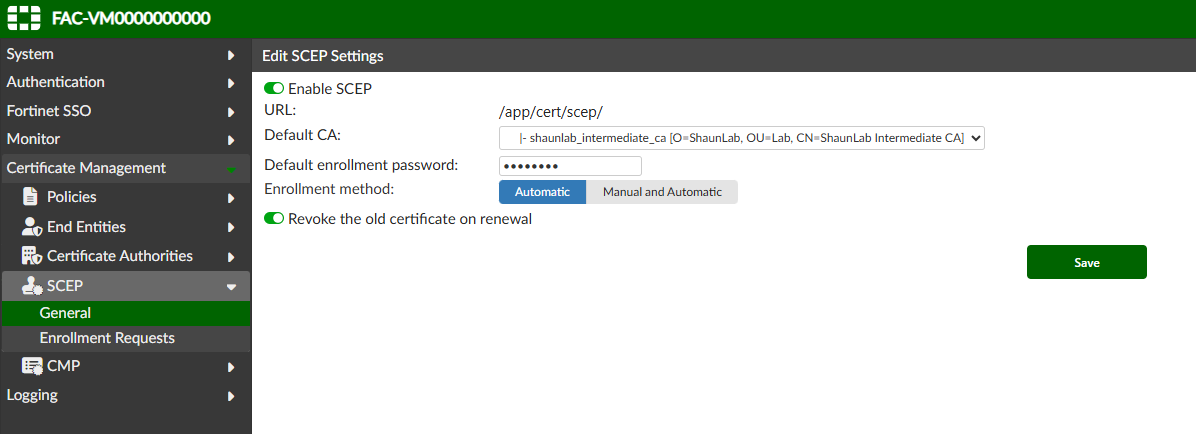
Enable SCEP globally, ensuring to select the Intermediate CA (as this is the CA which will issue the certs, not the root CA):
Configure enrollment requests:
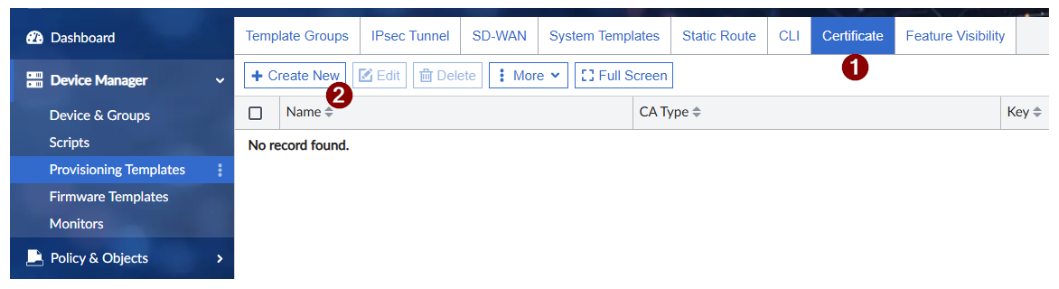
FortiManager - Certificate template and CA cert import
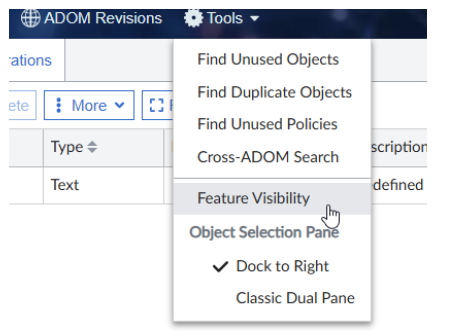
Open the Certificate provisioning template section and Create New. If you can't see Certificate, enable it under Feature Visibility (Feature Visibility is shown on the right in my screenshot below)..
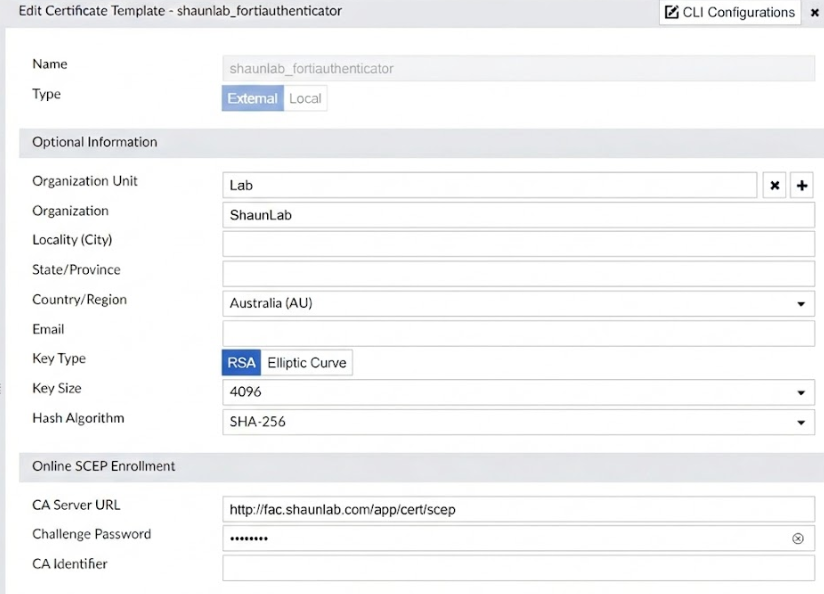
Fill out the settings. Note - the Organization you type in here must exactly match what you have configured under the FortiAuthenticator enrollment request, otherwise certificate enrollment will fail.
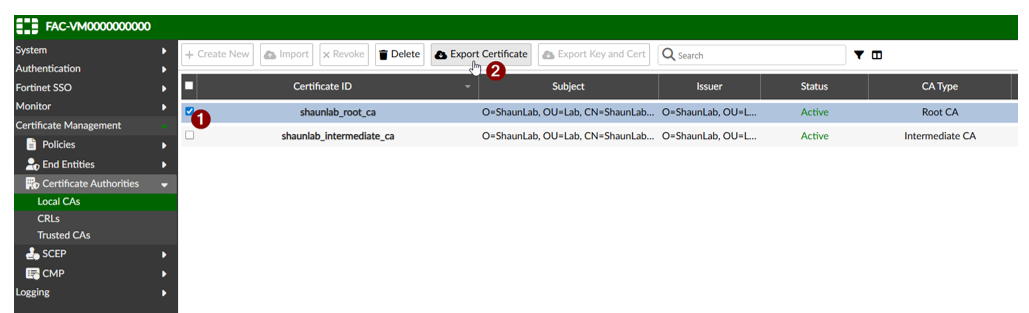
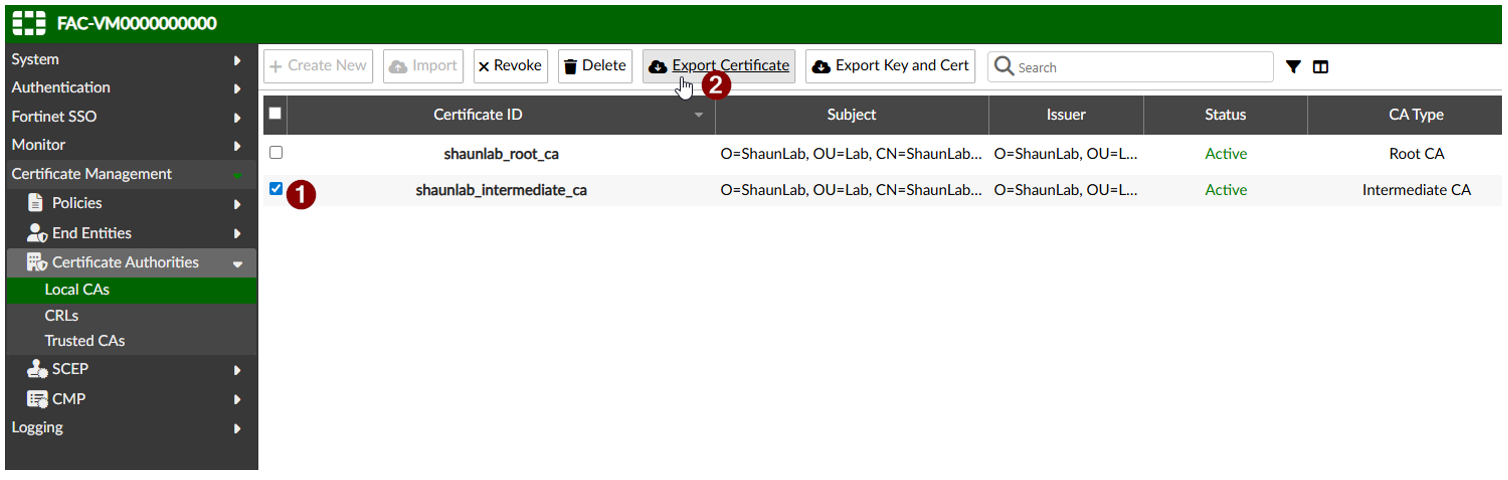
Download a copy of the root and intermediate CA certificates from FortiAuthenticator:
Go to Policy & Objects -> Advanced.
Then go to Tools (at the top) -> Feature Visibility -> enable the following options:
CA Certificates (needed to import the root cert)
Dynamic Local Certificate (for viewing only - no config needed)
Upload the root and intermediate certs:


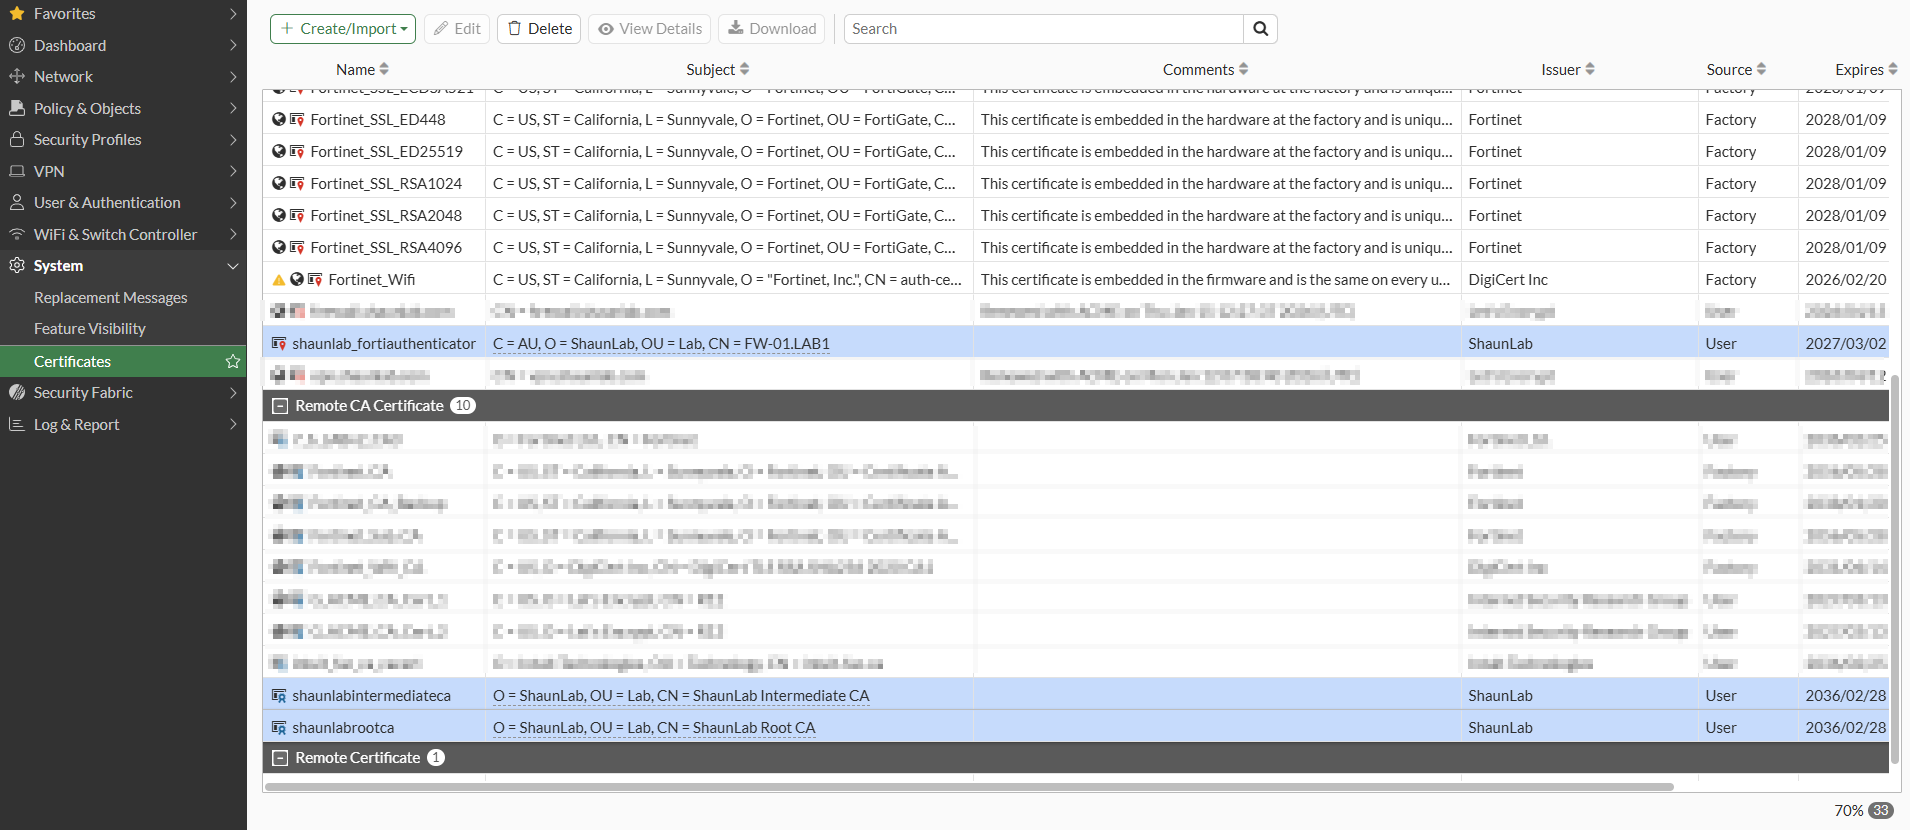
Certificate Installation
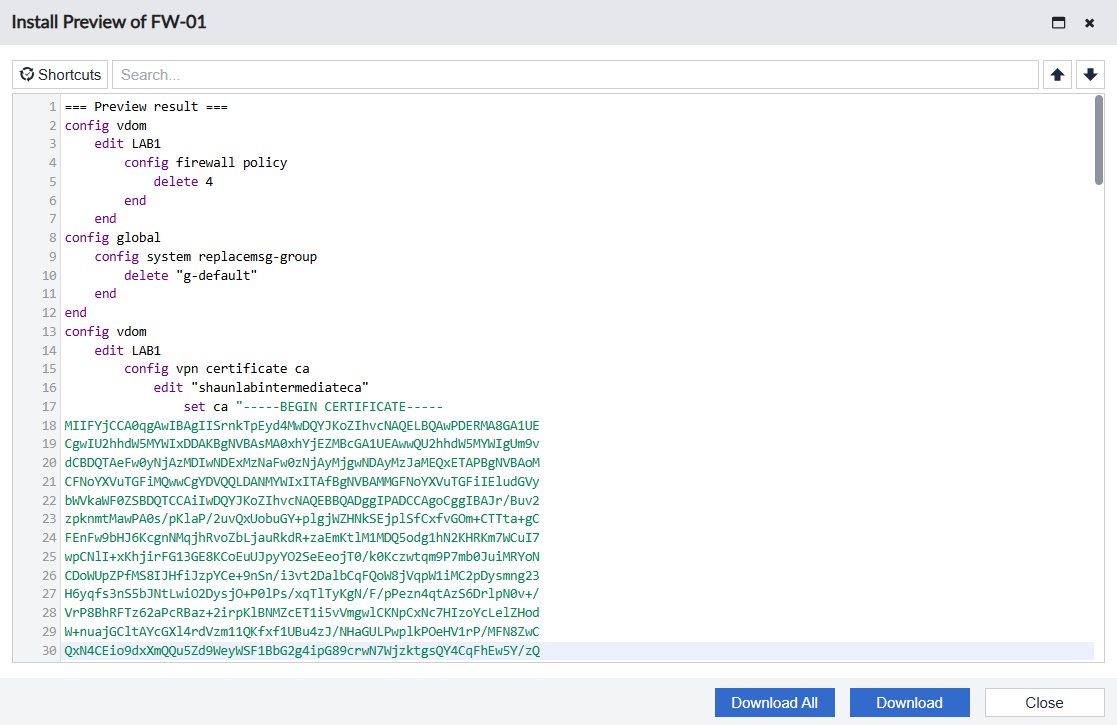
After downloading the root and intermediate CA certificates from FortiAuthenticator I opened each certificate in a notepad, copied the certificate contents and put them into a CLI script so they can be installed on all firewalls. You can do this via CLI script from FortiManager to make deployment easier.
config vpn certificate ca
edit "shaunlabintermediateca"
set ca "-----BEGIN CERTIFICATE-----
YOUR_CERTIFICATE_CONTENTS_GO_HERE
-----END CERTIFICATE-----"
config vpn certificate ca
edit "shaunlabrootca"
set ca "-----BEGIN CERTIFICATE-----
YOUR_CERTIFICATE_CONTENTS_GO_HERE
-----END CERTIFICATE-----"
The next step I took was to install the changes from FortiManager onto each FortiGate. At this point, FortiManager was ready to install both CA certificates as well as the unique per firewall certificate.
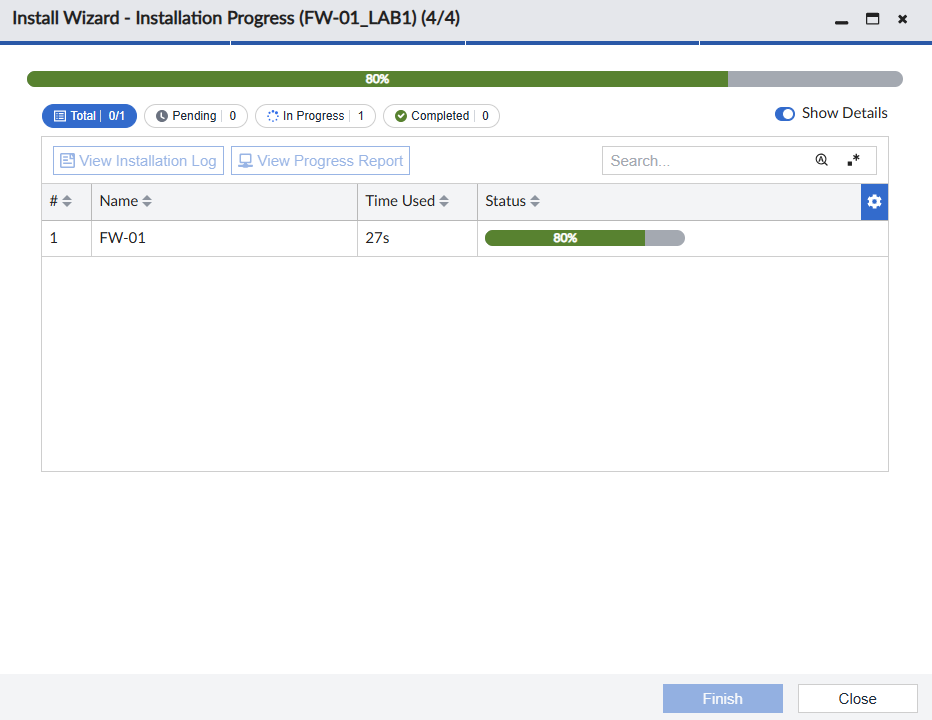
Now the individual firewall certificate as well as the root and intermediate certificates are installed.
Then I applied the following CLI configuration to use the certificate for site to site VPN authentication:
config user peer
edit "peer1"
set ca "shaunlabintermediateca"
next
end
config vpn ipsec phase1-interface
edit vpn1
set certificate shaunlab_fortiauthenticator
set authmethod signature
set peer peer1
end
Note: the remainder of the VPN configuration is omitted from the above output, this is outside the scope of this article.
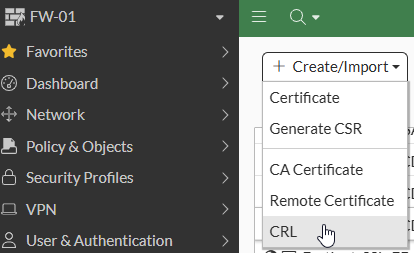
CRL
Every CA deployment must have its own Certificate Revocation List. This is the mechanism which stops revoked certificates from being used.
When I set this up I referred to:
In my lab, I have only imported the CRL into the firewall acting as the Hub. The Hub is a dial up VPN server for all site to site VPNs, therefore it needs to check the CRL before allowing certificate authentication from the spoke firewalls.
Download the CRL from FortiAuthenticator. You can find the CRL URL by double-clicking on the certificate issued to your firewall (mine is called shaunlab_fortiauthenticator) and the viewing the CRL Distribution Points section.
My CRL URL is http://fac.shaunlab.com/app/cert/crl/shaunlab_intermediate_ca.crl . Clicking on this link will download a copy of the CRL.
Next, I imported it into the firewall. It was imported as a File Based CRL.
and then configure the CRL entry to specify the CRL URL as well as the frequency to update the revocation list:
config vpn certificate crl
edit "CRL_2" (yours might be CRL_1, mine is CRL_2 because I already had another CRL on the firewall)
set http-url http://fac.shaunlab.com/app/cert/crl/shaunlab_intermediate_ca.crl
set update-interval 10
next
end
You should browse to the CRL URL as well to ensure that it is functioning.
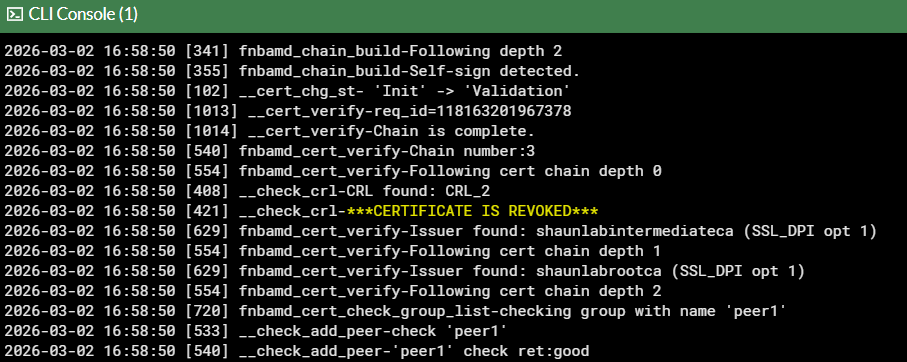
When you double click on the CRL entry under System → Certificates → CRL, it will show you a list of the revoked certificate serial numbers. The firewall can only deny connections from revoked certificates if the serial number of the revoked certificate appears in this list.
If you revoke a firewall certificate, you can check the debug logs on the hub firewall to verify that the hub firewall is seeing the certificate now revoked:
diagnose debug reset
diagnose debug console timestamp enable
diagnose debug application fnbamd -1
diagnose debug enable
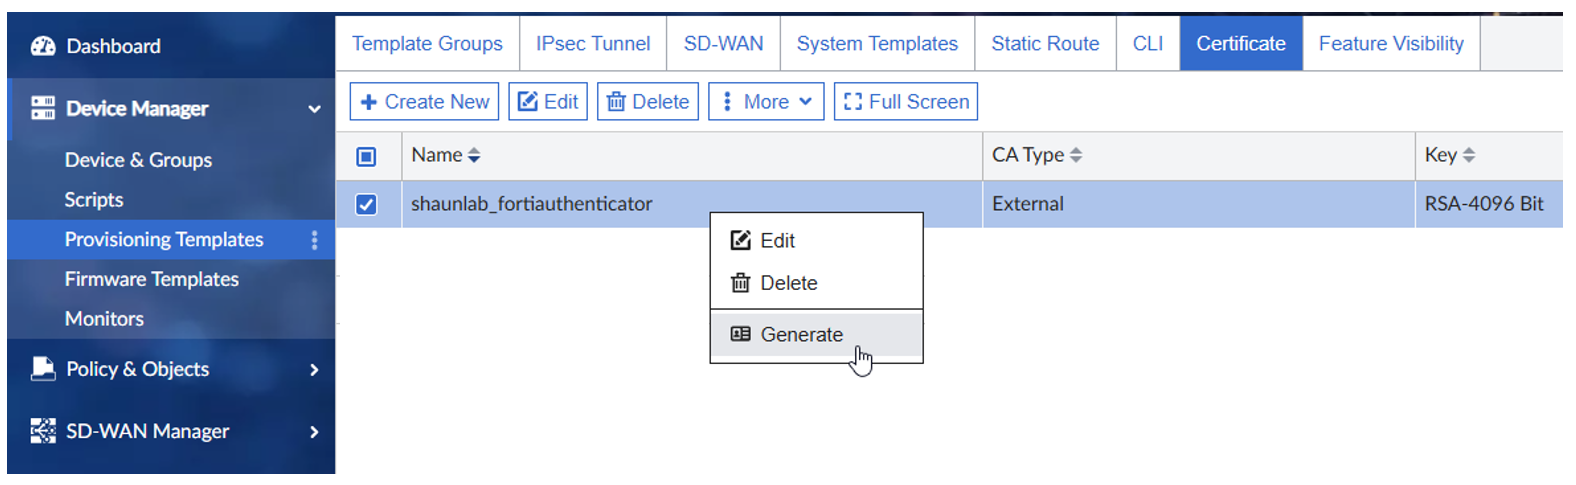
Certificate Renewal
When it comes time to renewing the certificates, you can do it through the Provisioning Templates section. I have not yet seen an automated method to renew certificates, so in my situation I will be relying on some sort of other reminder system and then re-generating the certs myself via FortiManager and installing them. Once you generate as shown below, it should give you the opportunity to install them through the installation wizard. After installation, check the expiry date on the certificate to verify success.